Step-By-Step Chrome Installation for Mac
Download PDF: KB0221
SoftLINK provides teachers with the ability to monitor and interact with their students’ Google Chromebooks in the classroom. Teachers can now monitor their student Chromebooks using a Mac. The installation process involves completing each of the steps below.
- Install SoftLINK Name & Connectivity Server The SoftLINK Name & Connectivity Server must be installed on a Windows based computer that has a static IP address. It can run on a server or a dedicated workstation.
- Install Teacher Component The School Tutor for Google Chrome extension must be installed on the teacher’s Mac device. The teacher’s device must have the Google Chrome browser installed.
- Install Student Component The School Student for Google Chrome extension must be installed onto each of the students’ Chromebooks. This can be done manually or can be deployed using the Google Admin Console for Education.
 Install SoftLINK Name & Connectivity Server
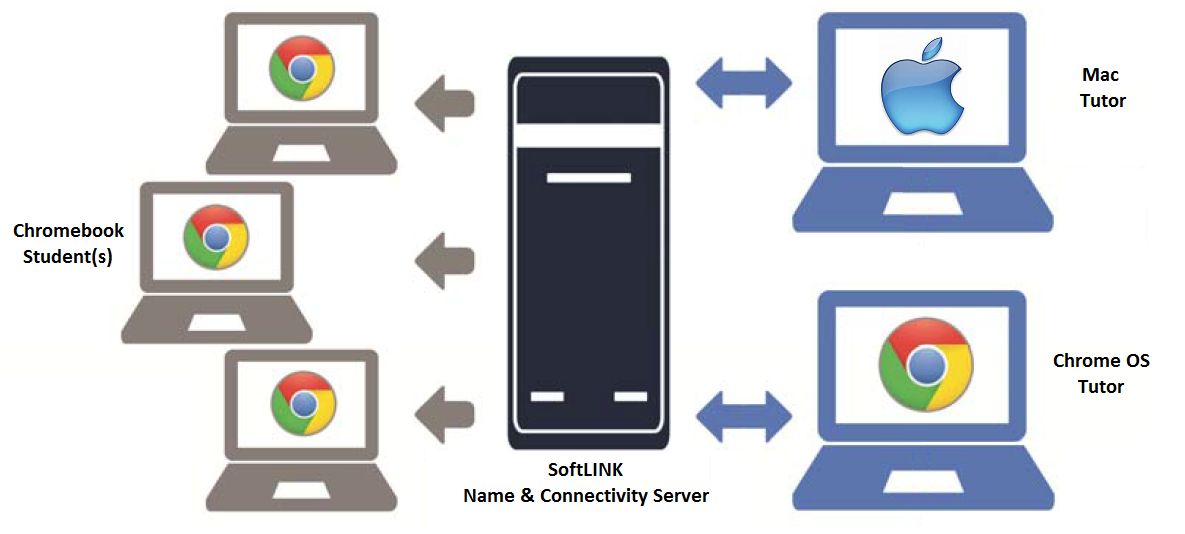
The SoftLINK Name & Connectivity Server or ‘Gateway’ is designed to negotiate connections between the School Tutor application used by teachers and the School Student extension for Google Chrome. Therefore, the Name and Connectivity Server must have a static IP address and be accessible at all times by both the Tutor application and Student extension across the network.- Launch the SoftLINK installer. Download installer using link below. http://www.acs-linksystems.com/downloads/SoftLink/SoftLINK12.00-setup.exe
- On the ‘License Information’ dialog, enter the license details provided to you separately or choose a 30 day evaluation.
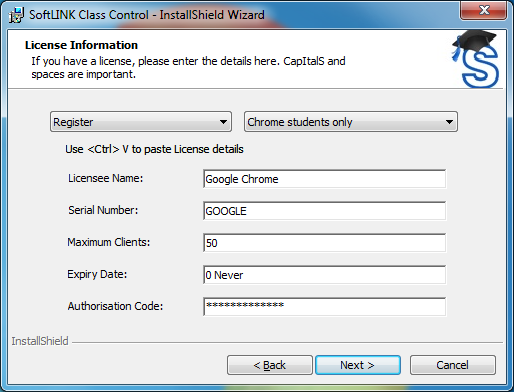
SoftLINK Classroom Management Software License Screen - On the ‘Custom Setup’ dialog, choose the ‘Name and Connectivity Server’ option and click ‘Next’.
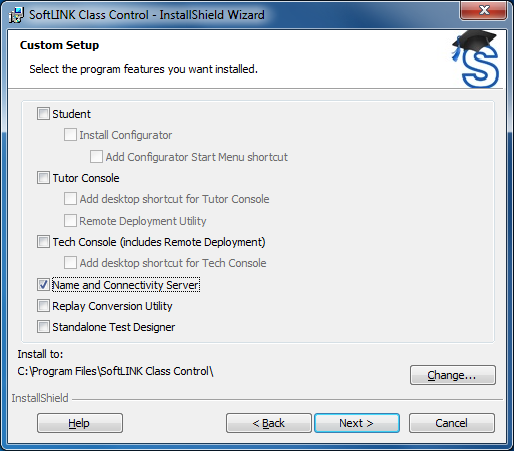
SoftLINK Classroom Management Software Name & Connectivity Server - At the end of the installation the ‘SoftLINK Connectivity Server Configuration Utility’ will be launched.
- On the ‘Keys’ tab, delete any existing keys and select ‘Add’ to create a new Connectivity Server key.
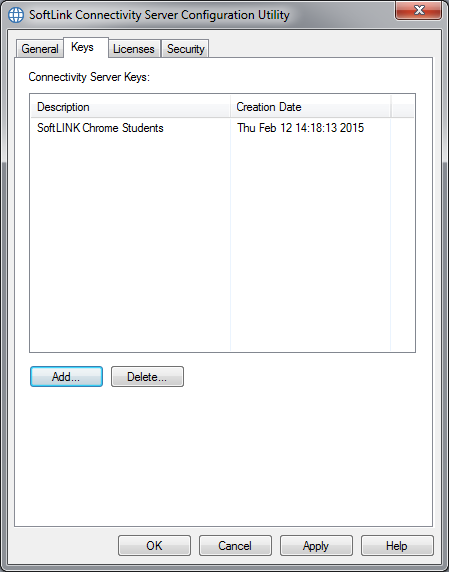
SoftLINK Classroom Management Software Name & Connectivity Server Keys - On the ‘Add Connectivity Server Key’ dialog enter a description (for example, “SoftLINK Chrome Students”) and click the ‘Set…’ button to enter and confirm your Connectivity Server key. Click ‘OK’ once done. The Connectivity Server Key is a password or passphrase of your own choosing. Remember your Key, it will be needed when installing the teacher’s component.
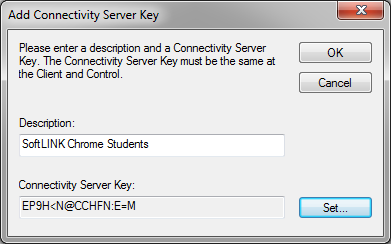
SoftLINK Classroom Management Software Add Connectivity Server Key - Click ‘OK’ to return to the ‘Keys’ tab, and click ‘Apply’ to complete the setup of the Name & Connectivity Server.
There is a utility called the ‘SoftLINK Connectivity Server Console’ that can be used to check the status of the Name & Connectivity Server and to see details of which students are currently connected. This utility can be accessed by right clicking and selecting ‘Open’ on the SoftLINK Connectivity Server Console icon in the notification tray. Note: This image shows a client listed. During the initial installation, no clients will be listed, only after the software is fully configured will any clients appear.
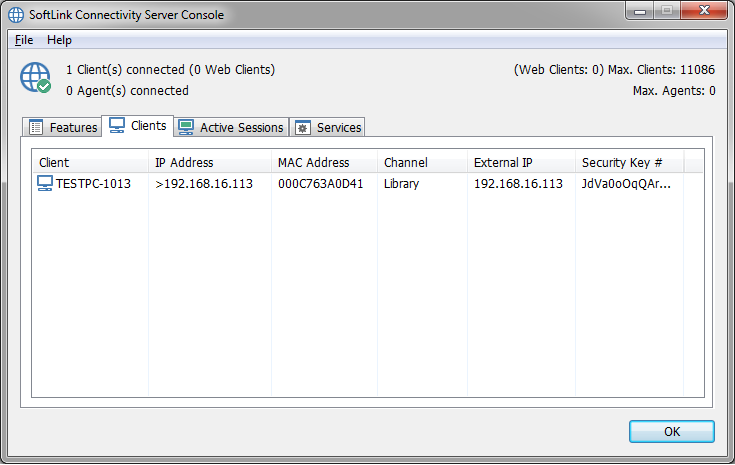
SoftLINK Classroom Management Software Connectivity Server Console Make a note of the following information as you will need it when configuring both the School Student extension for Google Chrome and the SoftLINK Tutor application.
SoftLINK Name & Connectivity Server details:
IP Address: ___________________________________________________________
Port Number: _________________________________________________________
Connectivity Server Key: ________________________________________________
Install Teacher Component
SoftLINK provides teachers with the ability to monitor, interact, and manage student Chromebooks in the classroom. Teachers that choose to use a Mac to monitor the student Chromebooks must install the Google Chrome browser on their Mac. Visit Google to download and install Chrome for Mac.
Install Teacher Component for Chrome
The School Chrome Tutor application is used by the teacher to communicate, monitor, control and test students; as such it should be installed on each teacher’s Mac device and configured to connect to the SoftLINK Name & Connectivity Server.
- Visit the Google Play store for the School Tutor extension for Google Chrome and select the “Add to Chrome” button. You can evaluate the School Chrome Tutor for 30 days on up to five student Chromebooks or, when prompted, you can enter your existing SoftLINK license information. If you’re new to SoftLINK or require additional licenses, contact your Applied Computer Systems, Inc. sales representative by calling 1-800-237-5465.
- Locate the NetSupport School Tutor for Chrome app and open it.

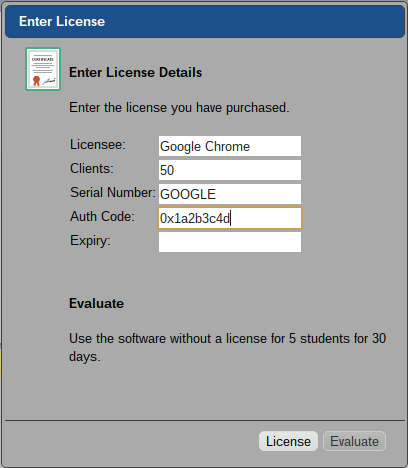
- The School Chrome Tutor will start and the ‘Enter License’ dialog will appear. Enter the School License details you have been provided with and click ‘License’ or ‘Evaluate’.
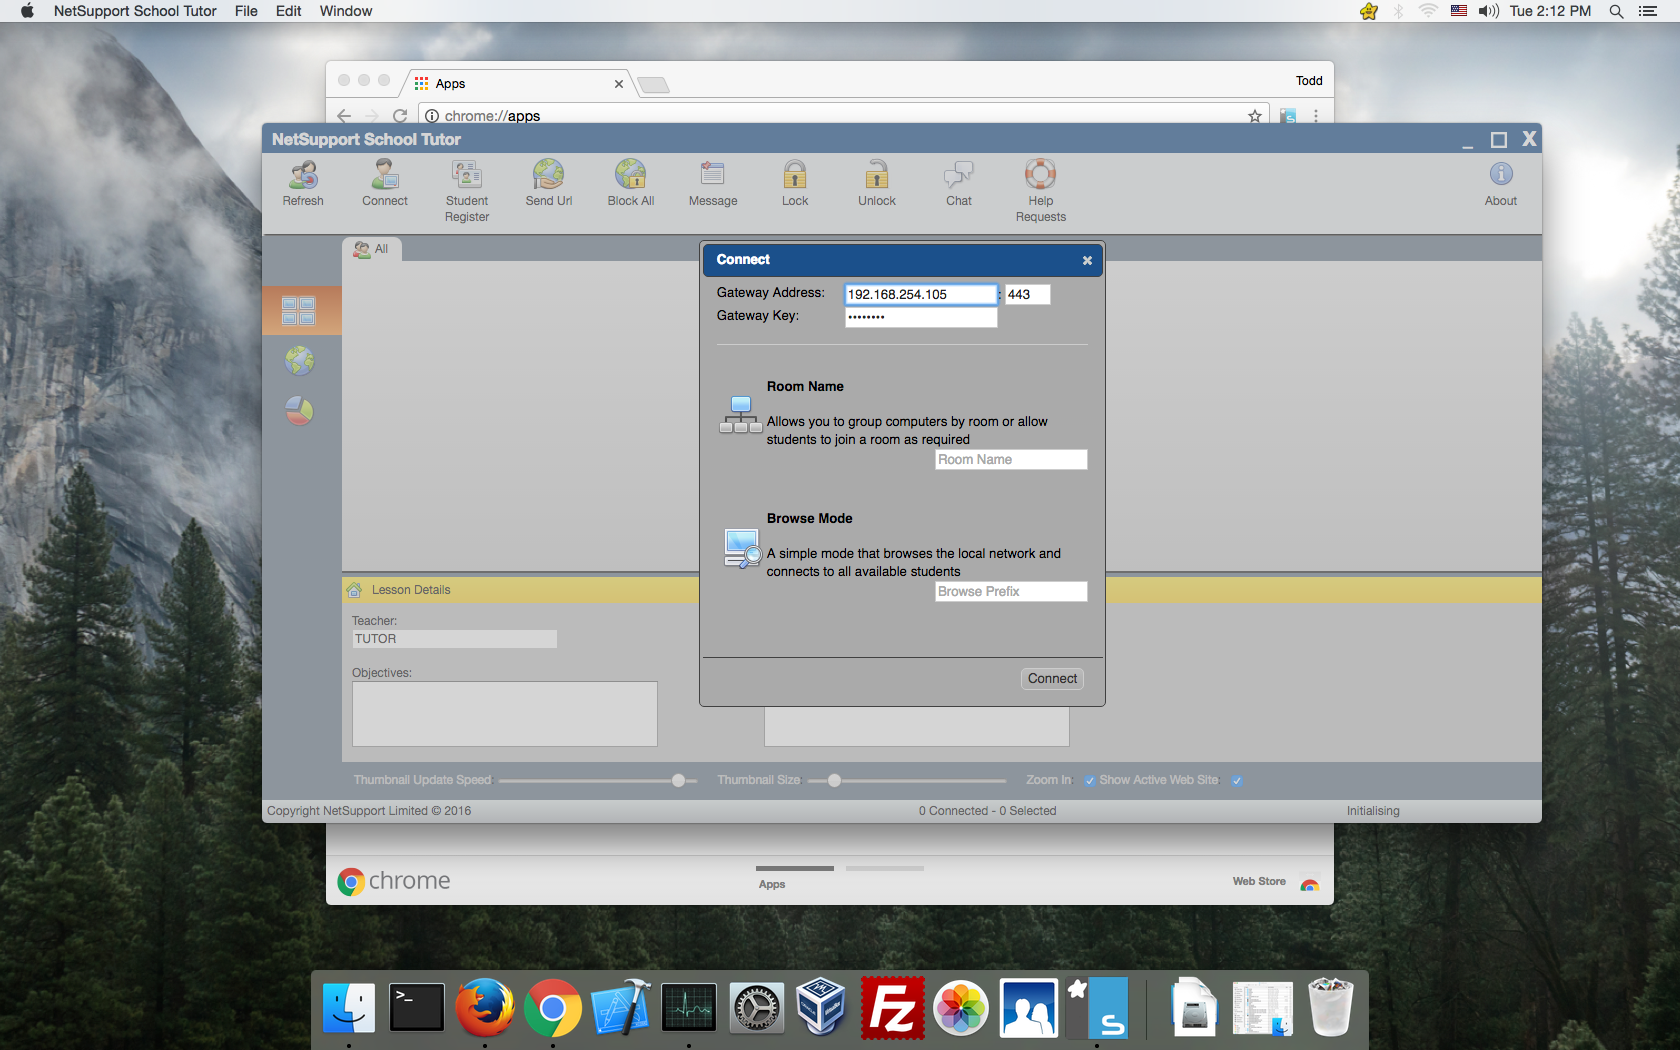
- The ‘Connect’ dialog will appear.
- Enter the Gateway Address, port number and Gateway Key. The Gateway Address is the IP address of the Name & Connectivity Server and the Gateway Key is the Connectivity Server Key. Both of these were determined in the first section of this installation guide.
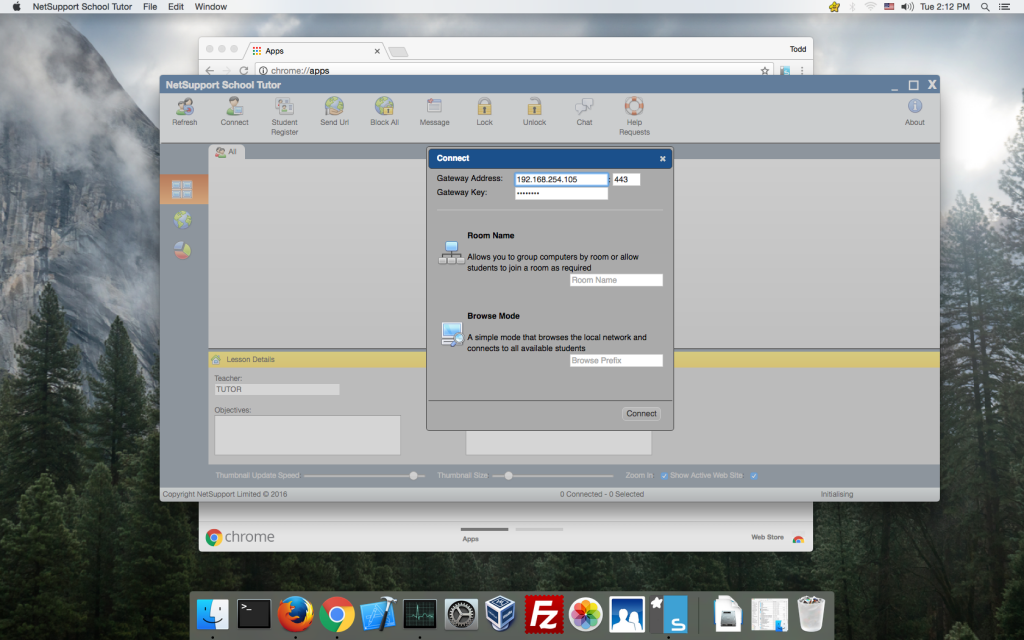
- Choose whether to connect to your Google Chrome Students using Room name or Browse mode.
- Click ‘Connect’.


Install Student Component
The School Student extension for Google Chrome must be installed on the students’ Chromebooks and configured to connect to the SoftLINK Name & Connectivity Server (covered earlier in this document) so that they can be monitored, managed, and respond to surveys and the student register.
- Visit the Google Play Store for the School Student extension for Google Chrome and, on the Extensions details page, click the ‘Add to Chrome’ button.
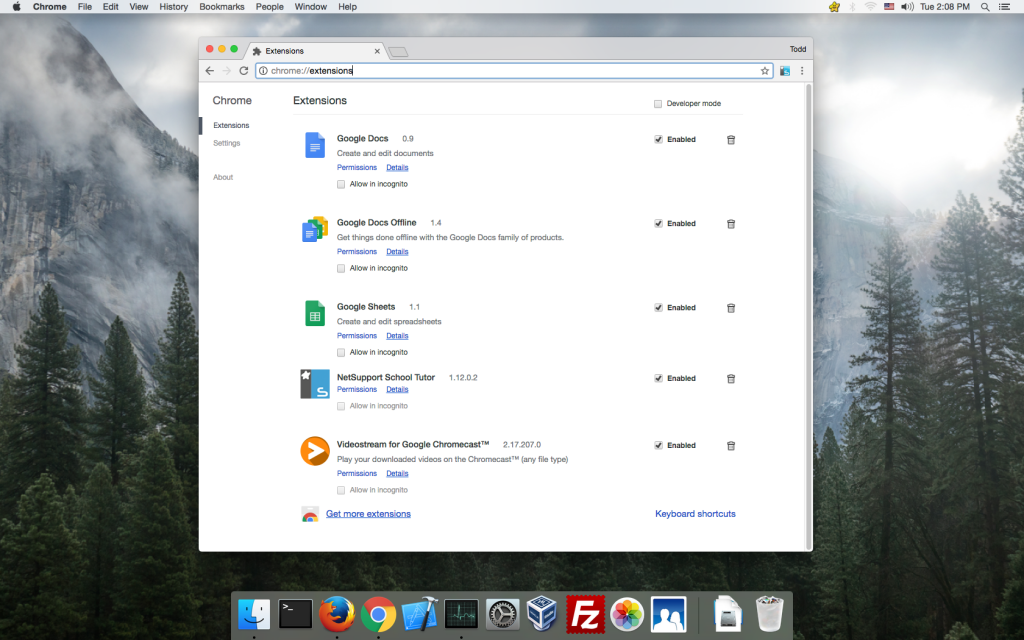
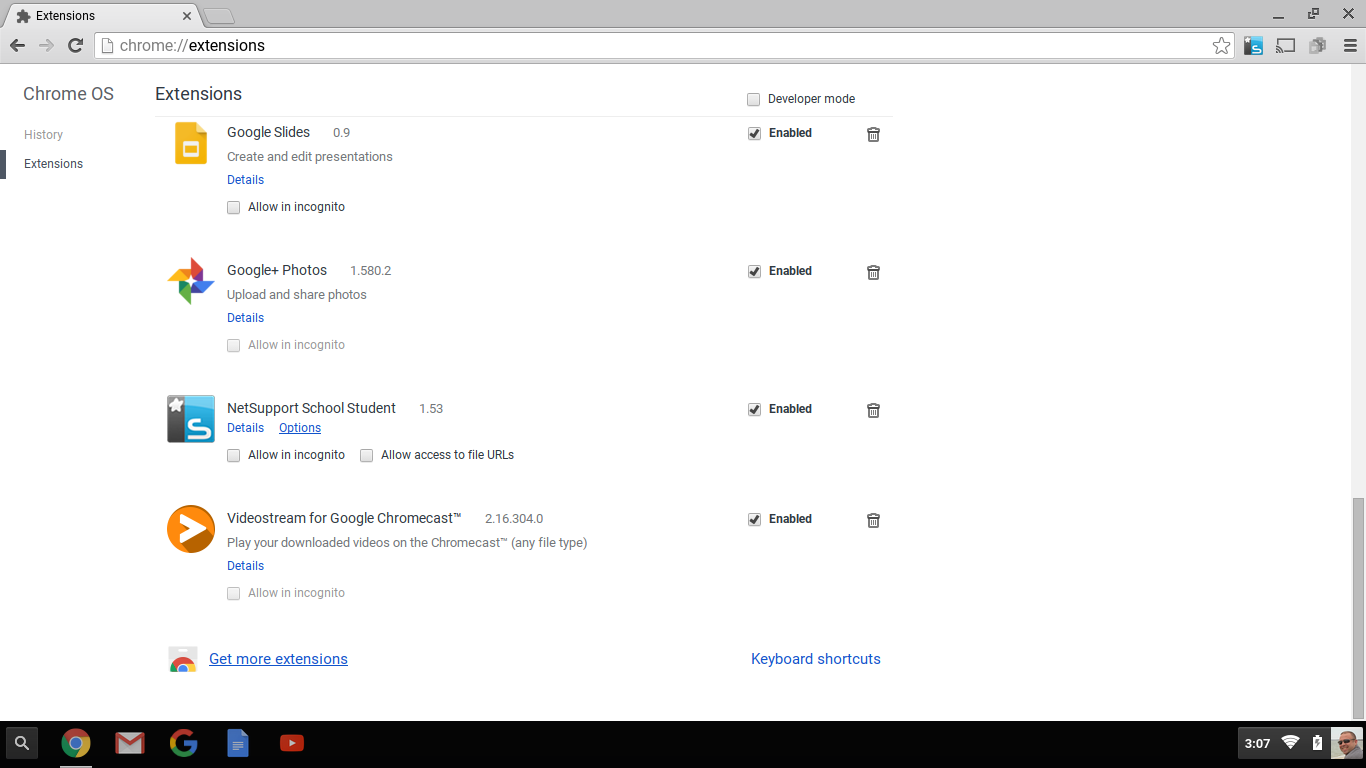
- On the student Chromebook, enter the URL chrome://extensions to access the ‘Extensions’ configuration page.
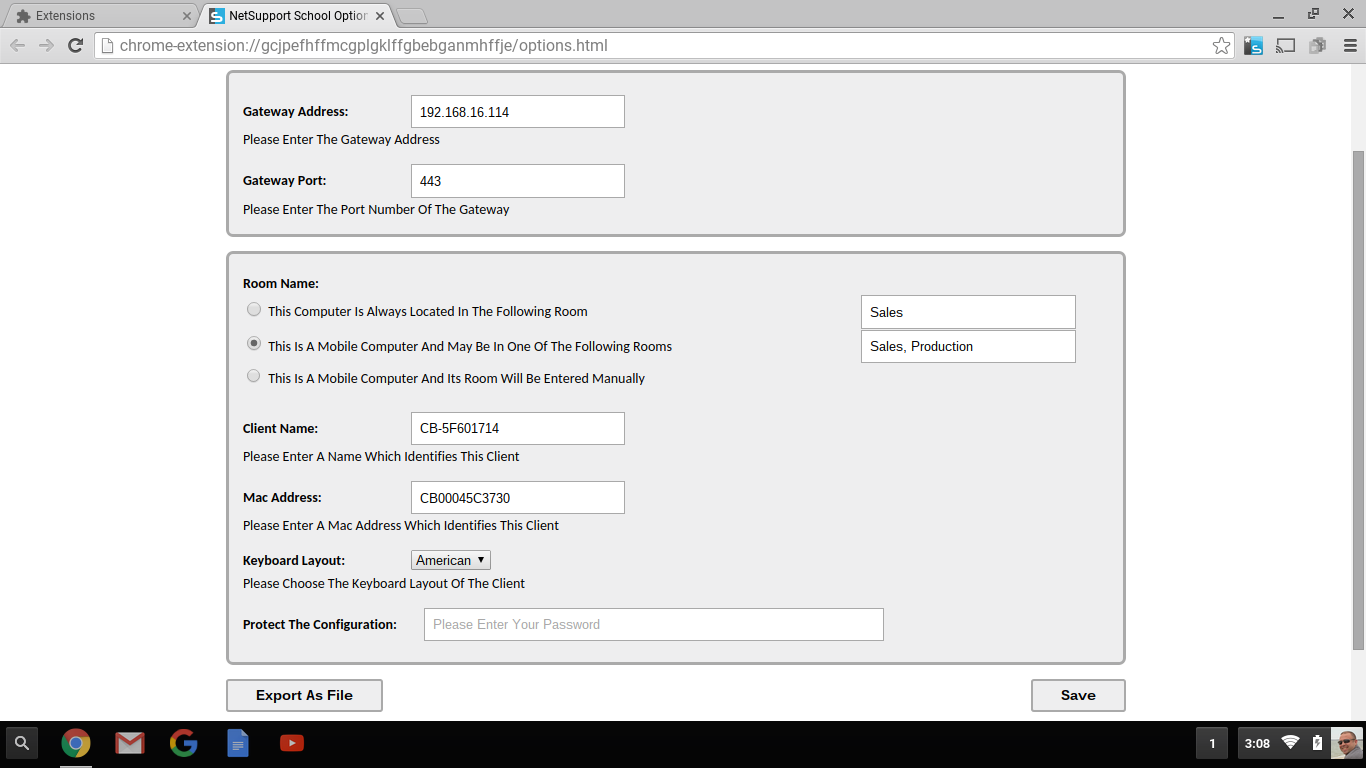
- Locate the NetSupport School Student extension for Google Chrome, and click ‘Options’.

- In the ‘Connectivity’ section, enter the ‘Gateway Address’ and ‘Gateway Port’ of the Name & Connectivity Server. The Gateway Address is the IP address of the Name & Connectivity Server and the Gateway Key is the Connectivity Server Key. Both of these were determined in the first section of this installation guide.
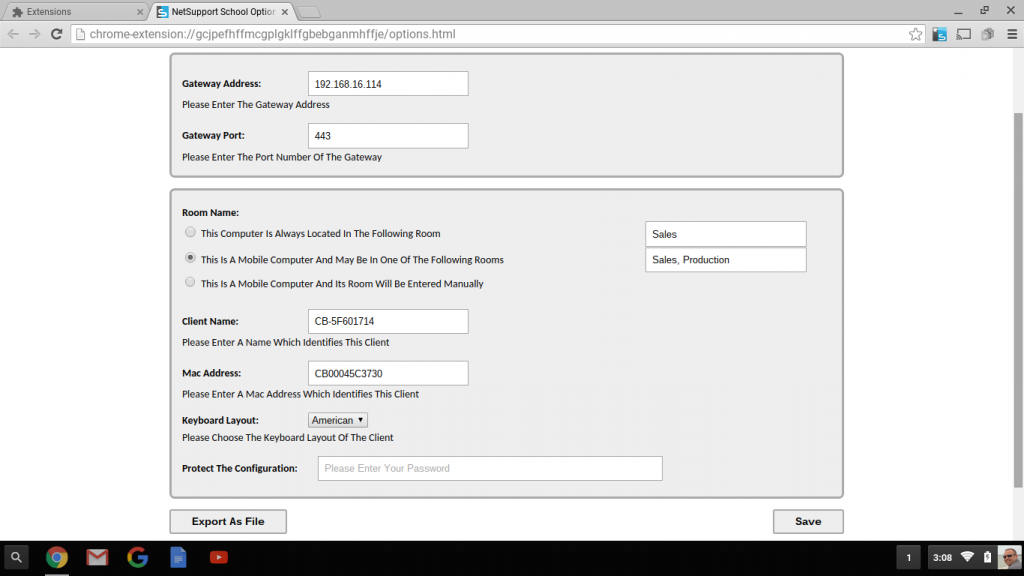
- Select the option ‘This computer is always located in the following room:’ and enter the room that the Chromebook is located in. This information is used to ensure that the Tutor and Students are connected to each other (this information can be updated later). Optionally, you may select This is a Mobile Computer and May Be in One of the Following Rooms. This scenario will require the students to connect to the teacher when they enter the class.
- Optionally, enter the Chromebook user’s name or asset number in the Client Name field. This information will appear on the SoftLINK Tutor interface when you are connecting to the Chromebooks.
- Click ‘Save’ when finished to complete the setup of the NetSupport School Student extension for Google Chrome.
- When deploying a large number of Chromebooks, it may be overwhelming to configure each Chromebook in this manner. The School Student extension can be added and configured using the Google Admin Console for Education. Please refer to the following section for complete details.
Google Admin Console Force Installation and Configuration for Chrome OS
Deploying SoftLINK for Chrome OS is extremely simple thanks to the ability to do a forced installation to the client Chromebooks. Not only can the extension be deployed to the user profiles in this manner, but the configuration of the extension can also be done in this way. Please note that in order to setup the School Student Extension, you will need the School Student extension added to your organization. Directions for adding Apps and Extensions can be found in the Google Answers pages: https://support.google.com/chrome/a/answer/6306504
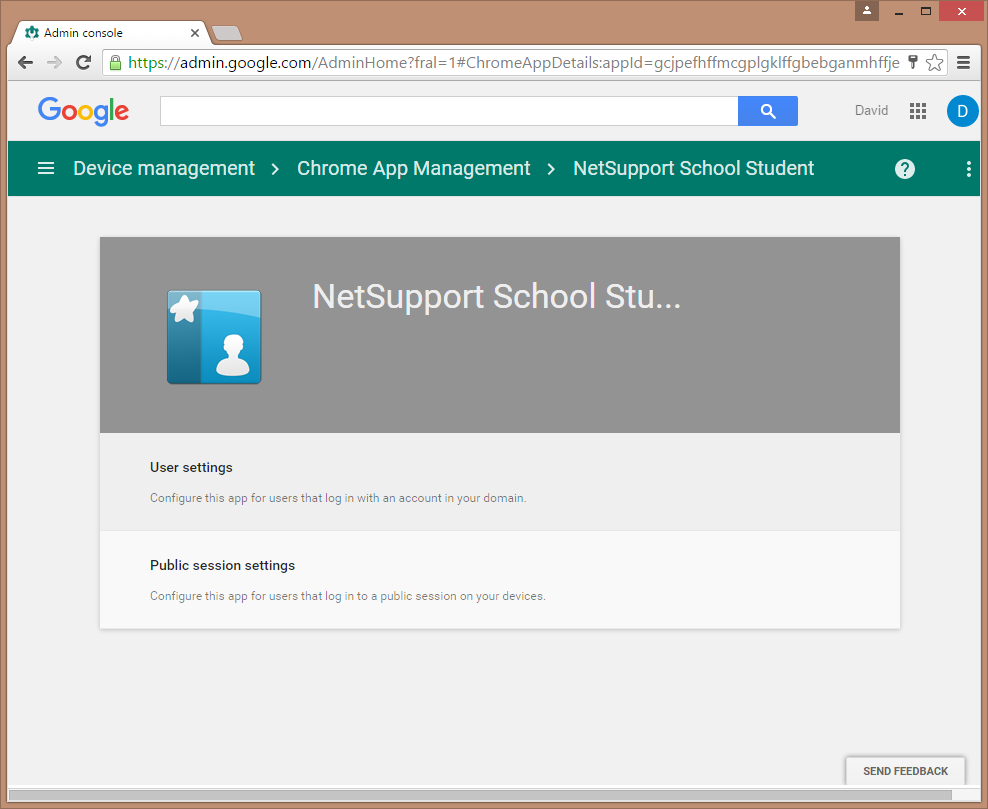
- Open the Google Admin Console for Education.
- Navigate to:
Device Management
Chrome Management
App Management

- Locate the NetSupport School Student Extension and click on it.
- Select ‘User Settings.’
- Locate the OU for the Students you wish to add the extension and configuration to. You should see the following menu items.
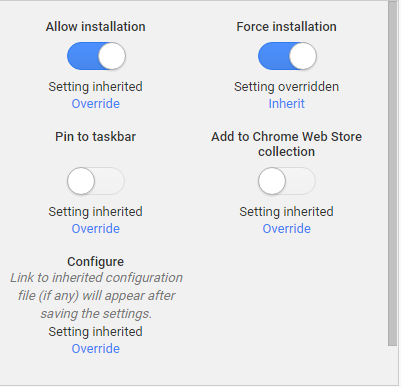
- Set the Student to ‘Force Installation’ to lock the extension so the students cannot uninstall it.
- To add the configuration file, click ‘Override’ in the Configure section.
- Click ‘Save.’
- Click ‘Upload Configuration File.’

- Locate the json file previously created through the extension (see How to Create a Configuration File below)

- Once uploaded, click ‘Save.’
- You have completed configuring the NetSupport School Student extension.
How to Create a Configuration File (json file)
- On your PC, open a Chrome browser.
- Click on the three bars to the right of the address bar to access Chrome settings
- Go to More Tools, Extensions
- Scroll to the bottom and click Get More Extensions
- Search for ‘NetSupport School’
- Locate the NetSupport School Student and click ADD TO CHROME
- Right-click the NetSupport icon next to the Address Bar and choose Options
- Enter the information for the extension (as though you were a student)
- Click Export As File
- Choose additional options
- Click Generate File
- Upload your newly created json file into the Google Management for Education Console.
Technical Support
Contact Applied Computer Systems, Inc. if you experience difficulties during the installation process. Knowledgeable technicians can help guide you through the installation process and can provide answers to any questions you may have.
Email: support@acs-linksystems.com
Phone: 1-800-237-5465